Computers are like anything else that people use in that they have control surfaces and buttons for making them do what you want.
The main interface for a computer includes physical and digital controls that can be accessed through a mouse, a touch surface, or a keyboard. Physical buttons are also located on the casing for specific functions. In addition, the operating system adds digital buttons, sliders, and other controls.
Let’s go over some of the basic controls you’ll want to understand how to use as a beginner-level computer user.
Power settings and power button controls
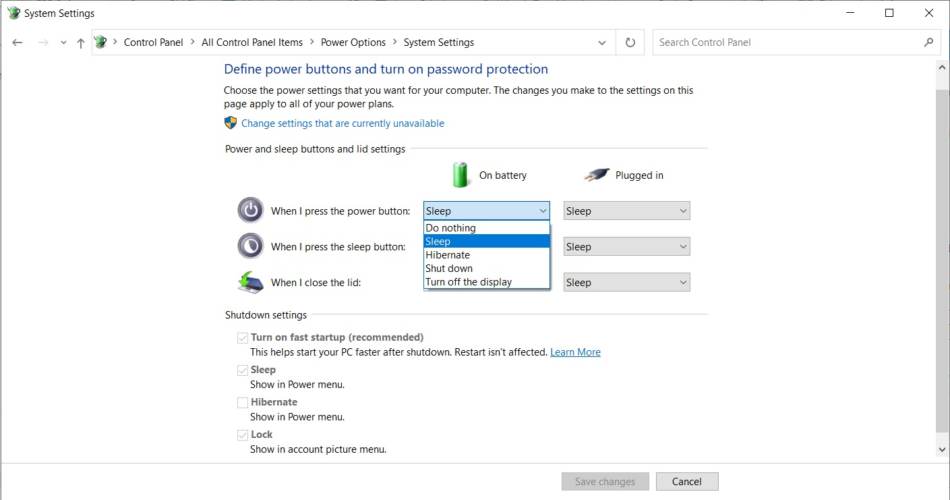
Your computer has a power button you can press to turn it on, but did you know that the power button can have a variety of behavior once your computer is running?
In the image below, you can see the options my laptop has available. The other menus you see there are the same. I like to have the default action to be Sleep, but in practice, I don’t use the power button other than to turn my computer on or force a hard shutdown.
Usually, to shut off your computer, you choose Shutdown from the Start Menu. This process is called a soft shutdown and is by far the most common way to shut off your computer. But what if your computer is locked up? What if it’s non-responsive, and you can’t do a soft shutdown? This scenario is where the hard shutdown comes into play.
To do a hard shutdown, press and hold down the physical power button. If you hold it for long enough, this will bypass everything and force a shutdown. It’s not something you will want to do often, but it’s a helpful trick if your computer is stuck.
In some cases, when you do a hard shutdown and then turn it back on, it will have an option to start the computer in safe mode. However, starting in safe mode is typically not necessary. Instead, you can select the option that states, start the computer normally.
You can choose the option you want by using the arrow keys to select it and pressing Enter to choose it.
Mouse controls and pointing devices
One of the most basic controls on your computer is through mouse movement. If you move the mouse, you can immediately see the cursor move on the screen.
In days passed, the mouse used to use a ball that rolled underneath it to track motion. Thankfully those days are over. The ball used to pick up small dirt particles, which would interrupt the way it worked. You would have to clean it to get it to return to standard functionality. Instead, modern mice use an optical sensor to track movement on your desk surface.
There are settings in the Control Panel that allow you to change the cursor’s screen speed relative to mouse travel. You can change this speed and a few other mouse settings by navigating to it in the Control Panel or searching for Mouse Settings.
Depending on the mouse you have, you should have, at a minimum, a left button, a right button, and likely a scroll wheel that spins and counts as a third button if you push down on it.
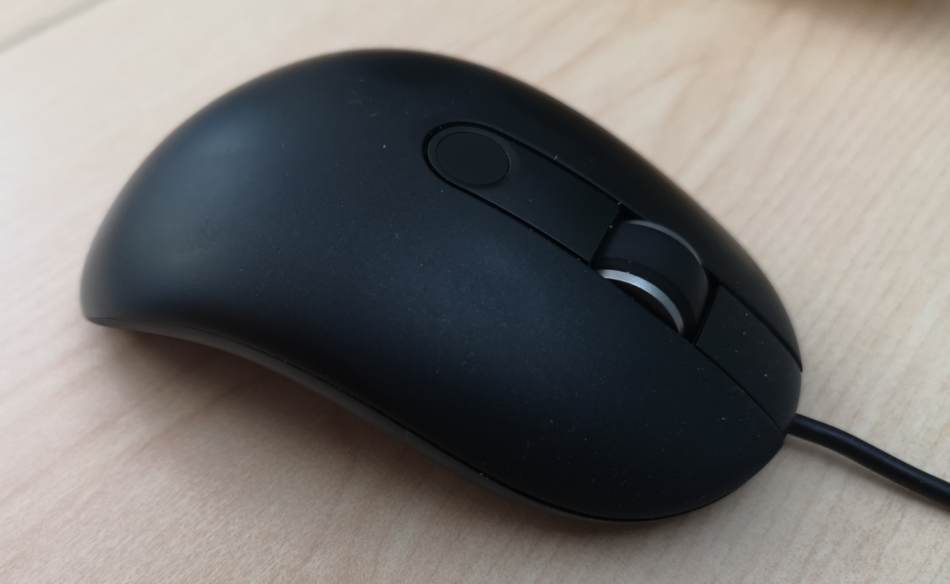
The left mouse button is your primary action button. On the operating system, a single click selects something or pushes a digital button. A double click with the left button opens a file using its default software or opens a software program.
The other main button is the right button. The right button opens a small options menu that conveniently lets you do some actions from the file or location where your cursor is currently positioned.
If you right-click a file, you’ll see the different file options that are available to you. If you right-click the Desktop or in the central open area of a folder, you’ll see the Desktop or folder options available to you.
Another crucial action is the ability to click and drag. To click and drag, click down on a file or folder and hold the button. At the same time, move the mouse. You will see a ghosted version of the file or folder under your cursor as you move the mouse.
When you let go of the left mouse button, you will drop the file in the new location you’re holding it over. The new position can be another place in the same folder or a different folder. It’s a quick, handy way to move files or folders.
The mouse can also select text. To do this, hover the cursor over one end of the text you would like to select, press and hold the left mouse button, and drag the cursor over the text. When you release the left mouse button, the text will be selected. To unselect it, click anywhere else, and the selection will be removed.
Touch surfaces change the game by allowing multi-touch and gestures. For example, you can pinch or spread your fingers to make the screen zoom in and out like on a smartphone. This is called a gesture. There are other gestures you can learn that, when used, give your device a different command.
Computers with touch screens and trackpads also allow gestures. Usually, there are only a few main gestures that you should learn, but hey, you can learn as many as you want.
| Gesture | Action |
|---|---|
| Touch a file or folder | Select the file or folder |
| Double-tap a file or folder | Open the file or folder |
| Place two fingers on the screen and move them at the same time | Multi-directional scroll |
| Place two fingers on the screen and pinch or spread them | Zoom in/Zoom out |
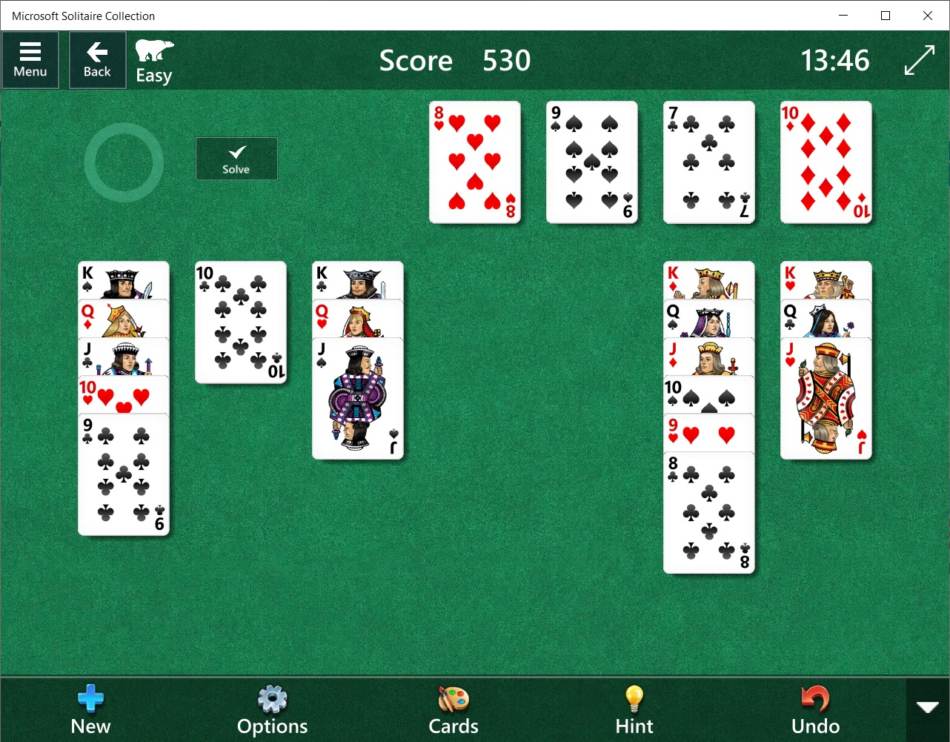
Have you ever heard of the game called Solitaire? It’s a card game that has been bundled with Windows for decades. But, did you know that the original intention of the Solitaire game included with Windows was to help people learn how to use the mouse?
In the game, you need to click, click and drag, and double click to play. By playing the game, you build those essential mouse skills required to interact with the computer. It’s still a staple of Windows operating systems released today.
Keyboard controls
The keyboard has the primary function of allowing the computer user to enter text. However, there are many more functions built into the keyboard that enable advanced control over your computer. I’ll cover a few in this article, but there are too many to include here.
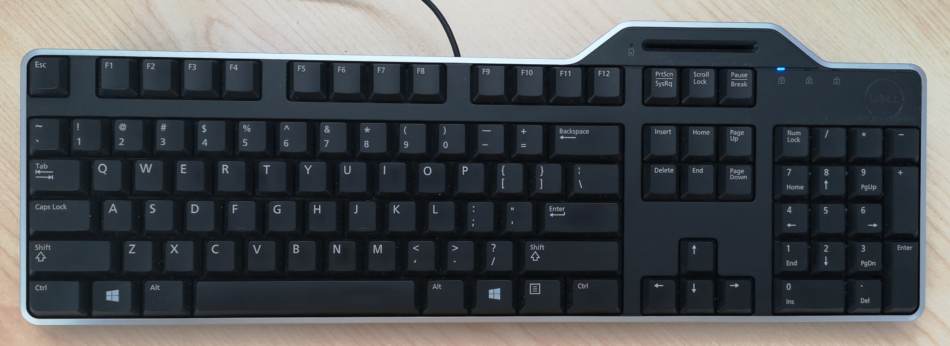
The text and the number buttons are pretty straightforward, but the shift keys need to be discussed. By pressing and holding shift while you press the text buttons or the number buttons, you get an alternate character. For easy reference, the alternate characters for the number keys are displayed on the buttons.
The text buttons are, by default, lower case. The computer will enter capital letters if you press and hold the Shift button while pressing the text buttons.
The cursor is an integral part of how the keyboard works because it marks where your text appears when you type characters using the keyboard. Usually, you can find the cursor by locating the vertical black line that is slowly flashing.
However, in some cases, it doesn’t flash, making it more difficult to find. In those instances, I’ll often press a few keys to see where the characters appear.
The cursor can be moved by single-clicking where you would like it with the mouse or pointing device, pressing the Tab button, or using the arrow keys. A quick warning, though; the mouse method almost always works, but the tab and arrow keys can be hit and miss.
Special use keys
| Insert | Toggles between overwriting text and inserting text in front of the cursor. |
| Home | Moves the cursor to the beginning of the line it’s on. |
| End | Moves the cursor to the end of the text on the current line. |
| Page Up | Scrolls up in a document. |
| Page Down | Scrolls down in a document. |
| Delete | Deletes the selected item or text or anything in front of the cursor. |
| Backspace | Deletes the selected item or text or anything behind the cursor. |
| Enter | Multifunction: Carriage return & line feed, execute, OK button, or ‘equals’. |
| Ctrl | Modifier key: Used in combination with other keys. |
| Alt | Modifier key: Used in combination with other keys. |
| Shift | Modifier key: Used in combination with other keys. |
| Windows Key | Opens the Start menu and acts as a modifier key. |
| Tab | Advances the cursor to the next tab spot. |
| Caps Lock | Toggles between text default as upper case and lower case. |
| Esc | No, quit, cancel, abort, stop. Sends an escape character. |
| PrtScn | Takes a screen capture of the entire screen and puts it on the clipboard. |
| Space Bar | Adds a space in text or presses a selected button. |
| Arrow Keys | Used to move the cursor in the desired direction. |
| Function Keys | The F keys at the top of the keyboard can be programmed. |
Multi-use keys on laptops
Laptops have an additional challenge when it comes to their design in that the space available is limited. As a result, engineers often introduce a Function or Fn button to deal with this keeping the capability as complete as possible.
When you press and hold the Fn button, it unlocks some of the features seen on keys that can’t be accessed using the Shift button. Usually, on the F-keys along the top of the keyboard.
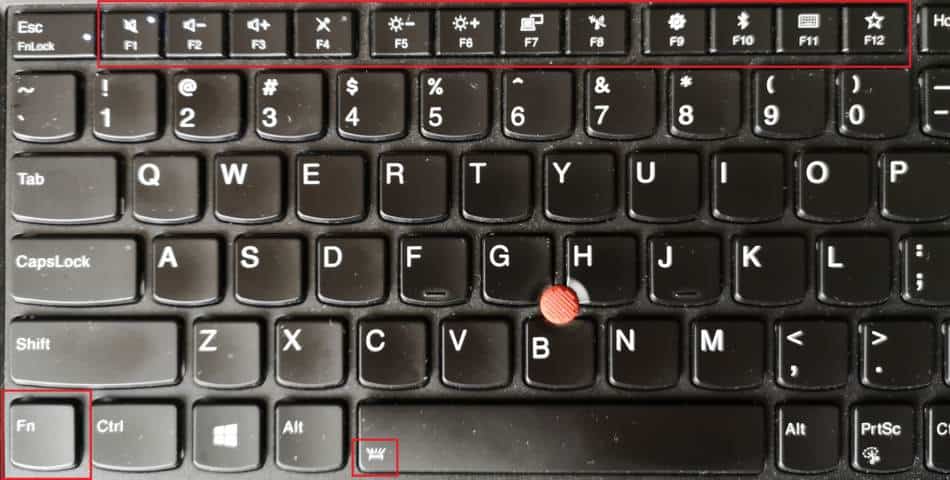
While the F-keys are often where this additional functionality is added, you can see a unique marker on my Lenovo laptop in the image above. The Space Bar has a symbol on it representing the keyboard backlight. If I press and hold the Fn button and tap the Space Bar, it toggles the keyboard backlight.
Typing speed
A valuable skill to develop is the ability to touch type accurately and quickly. Touch-type means being able to type without looking at the keys. It used to be that you just had to practice typing a lot or buy a typing tutor program to build up this skill.
Today, there are several free online resources that can help you get your typing speed up over 100 WPM or words per minute. My favorites are keybr.com, typeracer.com, and monkeytype.com.
If you get to a point where you feel stuck on keybr, you need to practice more. I found that I would get stuck on a specific key like the ‘q’ key, and I thought maybe the app had a bug. As it turned out, I just had bad habits, and my left pinky finger was the weakest. With enough practice, I was able to break through to the following characters.
Hotkeys
Remember above when I mentioned modifier keys in the special use key table? When used together with other key combinations, they can give you a convenient way to access additional functionality. These key combinations are known as hotkeys.
I’m going to share a few of the basic combinations that all computer users should know. Of course, there are many more, but these are often the most frequently used.
| Ctrl + C | Copy the selected characters to the clipboard. |
| Ctrl + V | Paste the most recent entry to the clipboard. |
| Ctrl + X | Copy the selected characters to the clipboard and delete them from here |
| Ctrl + S | Save the file that is being worked on. |
| Ctrl + A | Select all of the files/folders in the area where the cursor is active. |
| Ctrl + Z | Undo the last change or edit. |
It may seem silly if you haven’t had to use them very often, but these few simple hotkeys can completely change your productivity on a computer. They’re also applicable for use on files or folders or data in a given file. So experiment with them and see what you can do!
Digital interface controls
In your operating system and other software, you will encounter various controls—more than I can cover here. However, the most fundamental parts of the operating system controls include the Start Button, the Taskbar, and the System Tray.
When it comes to accessing files and folders, the tool used is Windows Explorer or just Explorer. Explorer is the Windows file manager that lets you navigate and work within the folder structure. It also allows you to work with files outside of their parent software package. I talk more about it in this article.
Settings and resources are managed through the Control Panel. In the more recent versions of Windows, there has been a movement away from the Control Panel, but it’s still there.
For more information about the digital interface controls available on your computer at a beginner level, check out this article.
