
As it was renamed in Windows 8, previously known and still often called Windows Explorer, File Explorer has been the file manager for Windows operating systems since as far back as Windows 95.
File Explorer is the graphical user interface for accessing files in MS Windows, and it forms the backbone of how people access the file system in Windows today. As opposed to typing text into a command prompt. It also presents fundamental user interface components such as the Desktop and Taskbar.
A computer is simply a machine that lets you create, manage, and work on files. That makes learning and understanding File Explorer fundamental to understanding Windows PCs and being more effective with them. Let’s get started.
How is Windows File Explorer Structured?
Learning the layout and structure of File Explorer is a great place to start. From there, we can branch out and chase down the details.
First, let’s open up File Explorer. Like most things in Windows, there is more than one way to do this.
For example, you can:
- Click the folder icon on the Taskbar
- Use the keyboard shortcut Win-E
- Right-click the Start Button and select File Manager
- Search for it using Windows Search
- And more…
Once you have the File Explorer open, you have what is called the Quick Access Toolbar on the very top left. It looks like this:
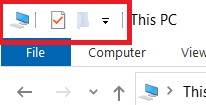
It has default functionality, but you can add more if you click the little drop-down marker that looks like this:
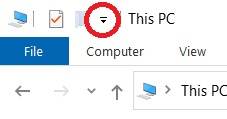
Once you open it up, you can see all the options you can add to the toolbar. Here’s what it’ll look like:

Next on the list is the File Explorer ribbon. Like all Microsoft products, the File Explorer also has a ribbon interface. Even though it’s small, it’s still how you access the lion’s share of File Explorer options and settings. This is what it looks like:
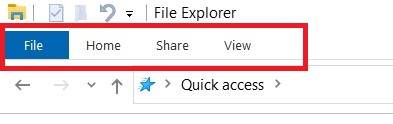
The File ribbon menu:
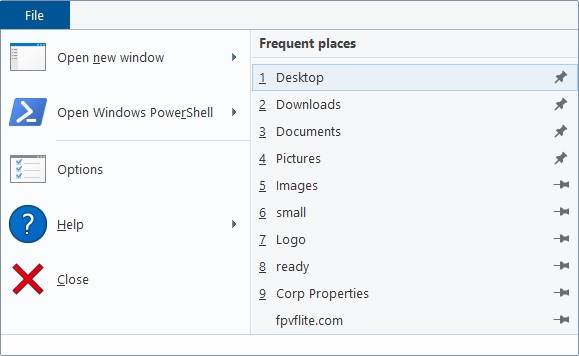
The File menu doesn’t have a lot on it other than it’s a good way to access PowerShell if you’re a PowerShell user or access the Folder Options utility. If you remember the old Folder Options utility, this is one way you can access it in Windows 10.
I don’t usually spend much time there, but I like to set it so that it shows hidden folders and that it shows file extensions. This is because some of my workflows make it so that those are important for me.
The Home ribbon menu:

The Home ribbon menu has some great functions for working with files and folders.
The Share ribbon menu:

The Share ribbon menu is aptly named since it facilitates file sharing with others. Yes, if you have a modem connected to a phone line on your computer, you can actually send a fax message.
The View ribbon menu:

The View menu is what you would expect, and it has some of the options from the Folder Options utility if you would rather avoid that relic. If for some reason, you need to access the Folder Options utility, you can also access it here by clicking Options on the far right side.
One of the options I enjoy on this menu is the Preview pane. It lets you get a sneak peek at the contents of a file before you open it. Just be aware that it’s rather heavy and can slow down your computer, causing some glitching when you open a file.
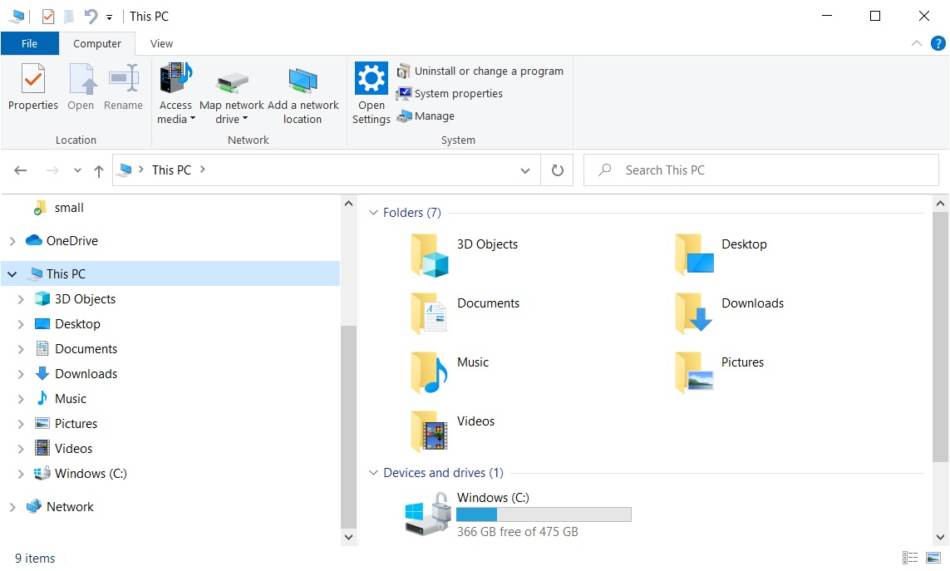
Side Note – If you miss My Computer’s familiar default layout, you can find it again by single-clicking on This PC in the File Explorer.
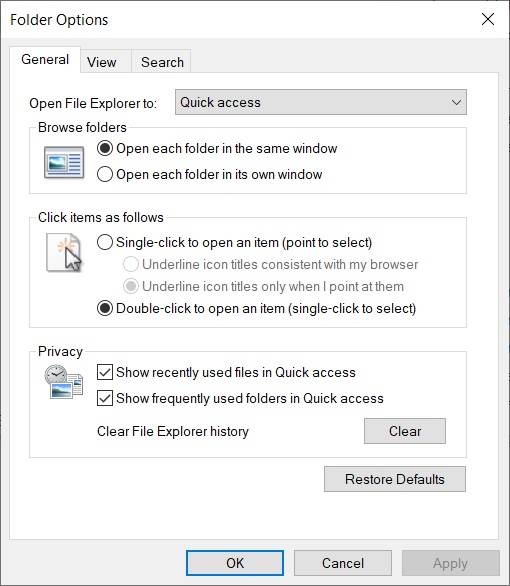
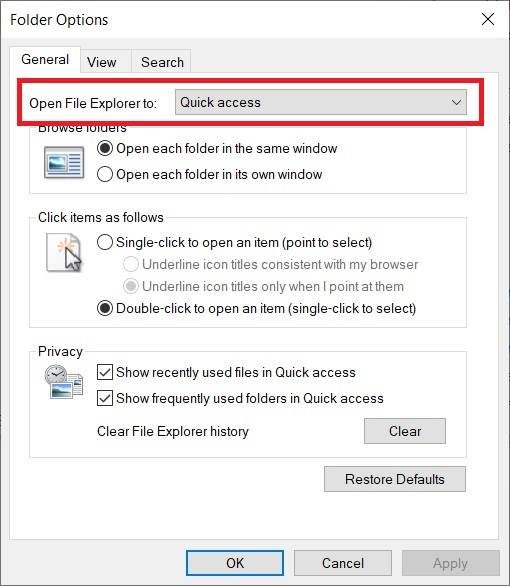
If you’re used to File Explorer opening to My Computer or This PC rather than the Quick Access interface, you can change it. A drop-down box at the top of the Folder Options utility lets you pick between Quick Access or This PC. I always change mine to This PC, but it’s really a personal preference. So here’s where it is:
Reminder: To open this utility, click Options on the File ribbon or the right side of the View ribbon.
How to Use File Explorer
Ok, so now you have a brief overview of the menus. Now, let’s look at the default Quick Access layout you’re presented with when you first open File Explorer.
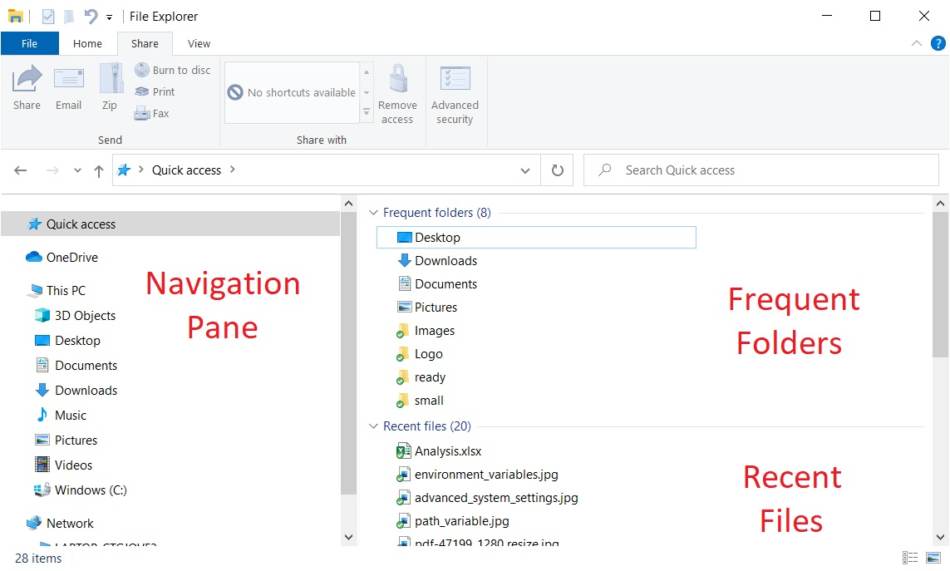
Navigation Pane – The Navigation Pane gives you the file structure of your PC in a visual form so you can click through and navigate to the various files and folders. You can also get to your Quick Access resources, your One Drive if you’re a subscriber, This PC which is the new My Computer, and any network resources. External drives also get shown here.
Frequent Folders – Frequent folders are where folders you’ve worked with recently are shown if you would like to reaccess them quickly.
Recent Files – Recent files are the same as Frequent Folders only for files you’ve recently saved.
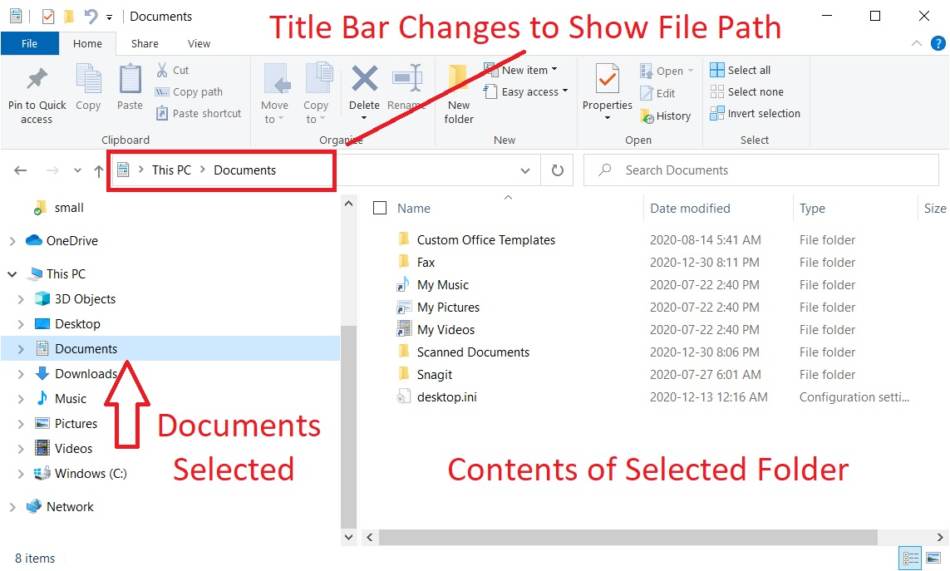
As soon as you start interacting with the File Explorer the default Quick Access layout changes to support the file manager process.
For example, if you select the Documents folder by clicking it once, the path in the Title Bar changes to show that you are looking in the Documents folder, and the contents of the Documents folder are displayed in the right pane.
You can move through the file structure using the Navigation pane, the Folder Contents pane, or the controls to the left of the Title Bar.
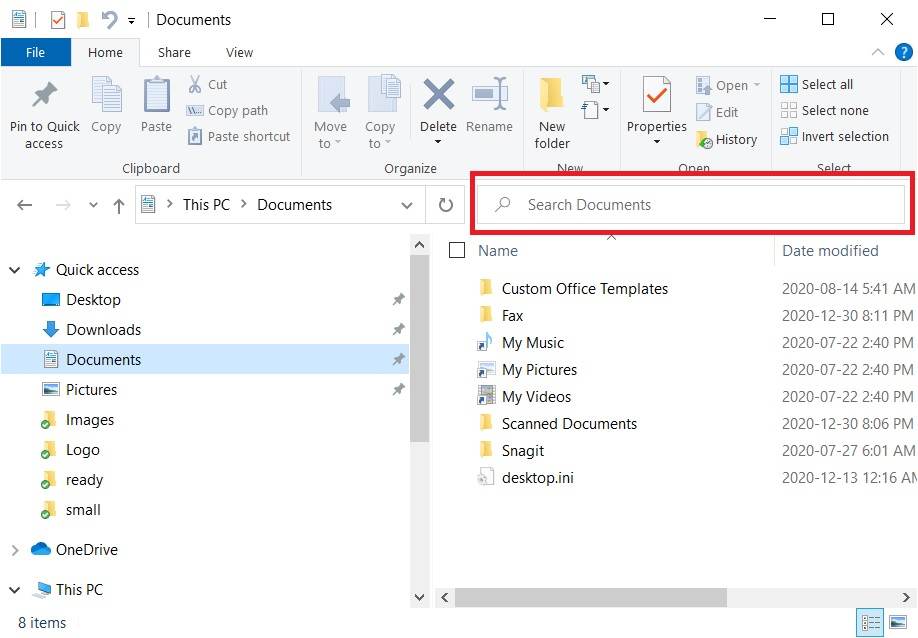
Perhaps you know the name of a file or what it might be named, plus the general area where someone should store it. The search bar to the right of the Title Bar lets you perform a targeted search on the current folder. Performing a targeted search can be a better approach than doing a full system search.
Especially if you have many files or if you have company network drives connected to your computer. You don’t want to bog down your machine searching through folders you know the file won’t be in.
How do You Work With Files in Windows?
What is a Computer File?
A comprehensive discussion on files would take an article of its own, but a small summary will suffice.
Believe it or not, a file is simply a collection of text bundled together that a specific application or collection of applications can read. This isn’t the normal text that you usually see in a typewritten letter or something.
It can hold that internally as data, but it also has special sections that are machine-readable by Windows and its intended software. So, depending on the file type, the text may not make much sense to you at all if you were to view it.
How To Open a File From File Explorer
This collection of text sits on your hard drive, and to access it, you double-click an icon that points to the text, which opens it up in the default application. Alternatively, you can right-click it and select Open.
Once it is in the default application, you can read and understand the data that it holds. Then, depending on the software, you may be able to make edits and save your changes.
How to Move & Delete Files in File Explorer
To move a file, people typically click on the file and hold the mouse button down while dragging it to where they would like it to be. Once the ghosted image of the file icon is hovering over the location you would like it to be, release the mouse button to place it.
You don’t have to place it perfectly. File Explorer will snap it into place based on the next available best spot and then sort them alphabetically once you refresh the pane.
To delete a file, you can move it to the Recycle bin on the Desktop using the process described above. Alternatively, if you right-click the file, select Delete and send it to the Recycle bin. Once it’s in the Recycle bin, it’s deleted, but technically, you can recover it by moving it back out of the Recycle bin or right-clicking it and selecting Restore.
How to Find Files From File Explorer
File Explorer has several default places to put files for common actions.
Downloads Folder – For downloads, your computer will automatically default to placing them in the Downloads folder. You can usually choose a different location when you start the download but sometimes you can’t. Not to worry, once the download is complete, you can move it out of the Downloads folder to wherever you please.
Documents Folder – Most office applications will default to saving your work in the Documents folder. People often don’t notice this since this kind of productivity software makes it very easy to save your work wherever you want.
It’s also common to right-click the pane where you would like a new file, hover over new, and select which new type of file you would like to make. With this method, the new file is already placed.
Pictures Folder – Similar to office applications, software that allows you to make pictures will default to saving them in the Pictures folder. For most people, this is Microsoft Paint, but any image processing or editing software will use it unless you over-ride it.
Recycle Bin – Sometimes, you can accidentally delete a file. As long as you haven’t emptied the Recycle Bin since it happened, it should be there. If it’s still there, you can restore it using the method described above.
Adjacent Folders – Some people will make a mistake in how they handle the mouse where a folder or file gets dragged into a folder that sits in the same folder as the file. What happens is they click and hold the mouse button when the cursor is over a file or folder, but they don’t realize it.
When they finally let go of the mouse button, the file gets dropped wherever the cursor sits. Sometimes over a folder, so it seems to disappear.
If you lose a file or folder, make sure that you check the other folders in the folder where it’s supposed to be. If you know what it was called, you can even use the search bar in the folder to locate it quickly.
What is a Folder?
A folder on your computer is a tool for organizing files and other folders. The concept of files and folders is used to make this particular organization method easy to understand. Fundamentally, a folder can hold both files and other folders. This gives you the ability to build a structure of files that are organized in a meaningful way.
There really aren’t any hard and fast rules for using folders, so feel free to use them how you see fit. When I use folders, I consider how to group my files and use folders to group them.
So, for example, perhaps I have a project. That merits a folder. Within the project, there are always blocks of work that have files associated with them that are unique and unrelated to other blocks of work. Each one of those could use a folder inside the project folder.
Plus, we could probably use a folder for the project administration. Once those folders are set up, it just goes from there. More folders in the parent project folder or within work block folders are set up to group files in a meaningful way.
How to Create a New Folder
Common File & Folder Operations
How to Rename a File or Folder
When you first create a new file or folder, the name is typically highlighted and ready for you to set the name. But what if you need to rename it later? For both files and folders, the operation is the same.
First, select the file by clicking it once and then right-click it. Then, from the drop-down menu, select Rename. Alternatively, once the file or folder has been selected, you can press F2.
Both of these actions will make the name editable again so you can make your changes. You can use your mouse or the left and right arrow keys to position your cursor if that’s something you need.
If you have file extensions enabled, be careful not to delete the file extension. Once you’re done, press Enter or click a spot somewhere else on the screen that is benign to save the name as you see it. That’s it!
How to Delete a File or Folder
To delete a file or folder, you need to click the item to be deleted and hold the mouse button down. Then, with the mouse button held, drag it to the Recycle Bin and release it when the icon is hovering over the waste bin icon.
Alternatively, you can right-click the file or folder in question and select Delete from the drop-down menu. This will also send the item to the Recycle Bin. Finally, when you’re ready to be rid of it forever, empty the Recycle Bin.
How to Search for a File or Folder
The File Explorer search feature is useful in that it lets you localize your search. However, if you search using Windows Search, it searches your entire PC by default. Sometimes that’s necessary, but it can render your computer unusable until the search is complete, and sometimes the search can take a while.
Instead, it’s better to use File Explorer to navigate close to where you think the file or folder should be and then use the search bar to the right of the Title Bar.
For example, if we look at what happens when we select a folder like Documents, you can see the text in the search bar changes to say, “Search Documents,” which means Explorer will limit the search to this folder and its subfolders. Targetting your searches in this manner can speed things up.
How to Select Multiple Files or Folders
Selecting multiple files or folders can be done more than one way, but I will discuss three of them here.
Click + Shift Method – If you have a list of files or folders and want to select a set of them listed one after the other, click the first item, press and hold Shift, and then click the last one. This will select all of the files between and including the first and last items.
Ctrl Key Method – You can select and deselect multiple items by pressing and holding the Ctrl key.
Click + Drag Method – You can select multiple items by clicking the left mouse button, holding it down, and dragging a box over the items you would like to select. Once you release the left mouse button, releasing will select the highlighted items.
Combinations – Combinations are possible such as using the Ctrl key method combined with the Click + Drag method to select files. Or selecting a large group of files using Click + Shift or Click + Drag and then using the Ctrl method to remove one or more that you don’t want to be selected. Play around with them and see what you can do!
How to Select All Files or Folders
The trick for selecting all items in a given pane is to make sure that the focus of the PC is in the folder whose contents you want to select either through navigation or by clicking somewhere in the pane. Once you’re sure the focus is set, press Ctrl+A to select all of the items in that folder.
What Are Shortcuts?
Shortcuts are a great tool used to make File Explorer more accessible and easier to use. These are the icons you see all over your PC that you click and double-click to do things. They’re in the Start Menu, on the taskbar, and your Desktop. But, of course, they can be in folders too.
They are a little pointer to the file, folder, or application that you’re looking for. They let the resource you’re trying to access be stored in a place that makes sense for your computer while allowing people to have access to it where it makes the most sense for them.
Over the years, Windows has evolved to use them more and more. I wrote a whole article on Shortcuts here that you can read if you want to learn more.
And that’s it! That the file manager application built into Windows called File Explorer. I hope this little guide helped you understand how to use it better.